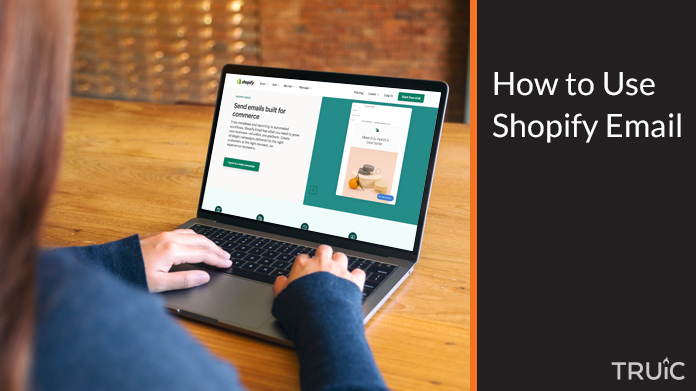
How to Use Shopify Email for Your Ecommerce Business
Shopify is an ecommerce platform designed to help you build and manage your small business. In addition to its in-depth analytics and easy-to-use layouts, Shopify also offers email templates, a drag-and-drop website editor, and automated emails through its email services.
Here, we will show you how to use Shopify Email to grow your business and gain new customers. Read on to learn how to sign up for and get started with Shopify Email, and how to improve your ecommerce business with this great tool.
After extensive research, we think Shopify Email is an amazing resource. Gain access and get started with a Shopify free trial.
What Is Shopify Email?
Shopify Email enables you to build a relationship with your customers using Shopify’s digital marketing tools. Using Shopify Email, you can create, send, and even track email campaigns from within the Shopify platform. Shopify also allows you to send emails that use your domain name (e.g., “@domainname.com”), increasing brand awareness.
Shopify Email is available to any user with a Shopify plan. Users can send up to 10,000 free emails a month based on individual emails sent. That means if you send one email 200 times that counts as 200 emails sent. After your 10,000 free emails, each email costs $0.001.
Looking for more information on ecommerce tools? Check out these useful articles:
Signing Up for Shopify Email
Signing up for Shopify Email requires just a few easy-to-follow steps. Before you get started, it’s important to ensure your Shopify account meets the requirements to use Shopify Email.
First, you must have an online store with the “Online Store” sales channel installed. Second, your online store also needs to have a paid Shopify subscription.
To sign up for Shopify Email:
- Go to the Shopify Email app page.
- Click on the “Add App” button. If you’re not already logged into your Shopify account, you’ll then see a prompt to do so.
- Click on the “Install App” button.
- Navigate to your “Shopify Admin” page and click on the “Marketing” tab.
- You should now be able to create an email campaign using Shopify Email.
Looking for more guidance on how to get started with Shopify? Check out our How to Make a Shopify Store guide.
Getting Started With Shopify Email
Once you sign up for Shopify Email, you can create an email campaign using this marketing tool.
To create your first email campaign:
- Log into your Shopify account and navigate to the “Marketing” tab.
![How to use Shopify email.]()
- Click on the “Create campaign” button, and then select the “Shopify Email” option.
![How to use Shopify email.]()
- You’ll then reach a page with branded templates for your email campaign. Select the one that best aligns with the campaign you wish to launch. A pop-up window will then appear so you can preview the template. If you’re happy with your selection, click on the green “Select” button.
![How to use Shopify email.]()
- The template will then open in the Shopify email editor. The first thing you’ll be able to edit is the customers your email campaign will reach. Select “All subscribers” to open a drop-down menu. You can then choose from the following options: “All subscribers,” ”Customers who haven’t purchased,” “Customers who have purchased more than once,” “Abandoned checkouts in the last 30 days,” and “Email subscribers.” Your target recipients will depend on your goals for the specific email campaign.
![How to use Shopify email.]()
- Once you select the recipients of your email campaign, you can then edit the subject and preview text for your email. (The preview text is what appears to your recipients when they see your email in their inbox.) Finally, you can edit the email address from which your campaign will come — either the one associated with your Shopify account or a custom email address.
![How to use Shopify email.]()
- Scroll down to the email editor and click on the header on the right side of the template to open the “Header” menu. From here, you can choose to display your logo or the name of your store in the header. (If you don’t have a logo, Shopify offers royalty-free images you can use instead.) You also can use this menu to edit the font size and style as well as the color of the background banner.
![How to use Shopify email.]()
- Next, click on individual blocks of text to edit the content of the email.
- If you wish to feature products, select the portion of the template that contains products and then click on the green “Select products” button.
![How to use Shopify email.]()
- Once the body content of the email is to your liking, scroll to the bottom and click on the last block of text. This is the footer. Select if you want the footer to display the address and phone number associated with your shop.
- If you want to connect your social media accounts to your marketing email, click on the
“Social media icons” button and then copy and paste the links to your business’s social media accounts. They’ll then appear as the social media icon associated with the related platform. - When you finish editing your email, you can preview how it’ll look on both desktop and mobile devices by scrolling to the top of the screen and clicking on the “Monitor” icon. Select the option you want to view to see if your email looks as expected on both display options.
![How to use Shopify email.]()
- When you finish making any final edits to your marketing email, you can preview it before sending it to your target customers. Next to the “Monitor” icon, you’ll find the “Send test” button. Click on this button and then input up to five email addresses to which you want to send your marketing email for a preview.
- When you’re ready to send your email to your full list of target recipients, click on the “Review” button followed by the “Send” button. Alternatively, you can schedule emails to be sent at a later date. To do so, click on the “Review” button followed by the “Schedule” button. In the “Send date” section, click on the date and select when you want to send your email from the available dates. Click on the “Send time” button, and then select the time you wish to send your email. Review the details, and then click on the “Schedule” button.


When using Shopify Email, it’s important to note that email addresses associated with your domain must first be forwarded to an existing email address hosted by a third party (e.g., Google or Microsoft Outlook). You can set up multiple store email addresses to forward to an existing hosted email address, but each can only forward to one email address.
To connect your store email to a hosted email address:
- Navigate to the Shopify admin page and then go to “Settings.” From there, select the “Domains” option.
- Click on the domain for which you want to set up email forwarding, and then select “Add forwarding address.”
- Click on “Add forwarding address,” and then type in your preferred name in the “Store email address” field. For instance, if you want your emails to appear from “[email protected],” you’d just have to input “Admin” in the text field.
- Next, insert your hosted email address in the “Forwarding email address” field. This email address will be the one that receives all emails sent to your store email address. If your store email address is “[email protected],” for example, all emails sent to it will actually appear in your “[email protected]” inbox.
- Click on the ”Save” button to ensure Shopify implements your changes.
Congratulations, you’re now ready to send marketing emails from your Shopify domain! Sending marketing emails is a great step forward for small business owners seeking to build repeat customers as well as brand recognition.
Learn how to add useful functionality to your website and better navigate the Shopify platform with our How to Use Shopify guide.
Improving Your Performance With Shopify Email
Shopify Email offers analytic tools to help you improve the performance of your email marketing campaigns and better understand your customers. Under the “Marketing” tab, you can view a campaign summary of your sent emails, email engagement. Specifically, you can see how many people:
- Opened your email
- Clicked on links inside the email
- Reported your email as spam
- Unsubscribed from your email list
This summary also tells you how many of your marketing emails were delivered, meaning the emails made it to the intended recipient’s inbox.
Using the Shopify Dashboard
One of the Shopify platform’s many features is the Shopify dashboard — an analytical tool designed to help users understand their ecommerce website’s performance.
You can find your analytics information by navigating to the “Admin” page and then selecting “Analytics.” The dashboard’s default view displays data for today vs. the day before.
If you want to see data for a longer period, select the “Date menu” followed by the window of time for which you wish to see analytics data. You can select a preset range like the “Last 30 days” or create a custom time period to view by clicking on specific dates on the calendar.
Other Useful Resources
Shopify offers a number of resources its users can access to better understand the Shopify platform and Shopify Email.
The Shopify Blog
Shopify runs a blog that publishes informative articles about selling on the Shopify platform and other ecommerce platforms. It also shares tips to help you market your online store as well as how-to articles to help you kickstart your small business.
The Shopify Help Center
If you get stuck in your small business journey and need support for your Shopify store, you can access the Shopify Help Center. It offers many useful articles to help you troubleshoot various issues you may encounter while using Shopify.
If the resources within the Shopify Help Center can’t answer your question, you can contact customer support with options for live chat, email, or a scheduled callback.
Shopify Online Courses
As part of your paid Shopify subscription, you can access Shopify Learn — an online platform with courses on how to start and maintain a successful ecommerce business. The Shopify Learn platform also offers courses on financial literacy, supply chain management, and other subjects a small business owner may want to learn about.
Moving Forward
Using Shopify Email and its marketing tools can improve your business performance and boost your brand awareness to support your Shopify store.
We believe it’s one of the best choices for an ecommerce website builder — especially with its added marketing and easy-to-use email tools.
Grow Your Business With Shopify
Shopify provides tools and resources to help you not only build your online store, but also grow your brand’s reach and attract new customers. Get started with a free trial by clicking on the button below.